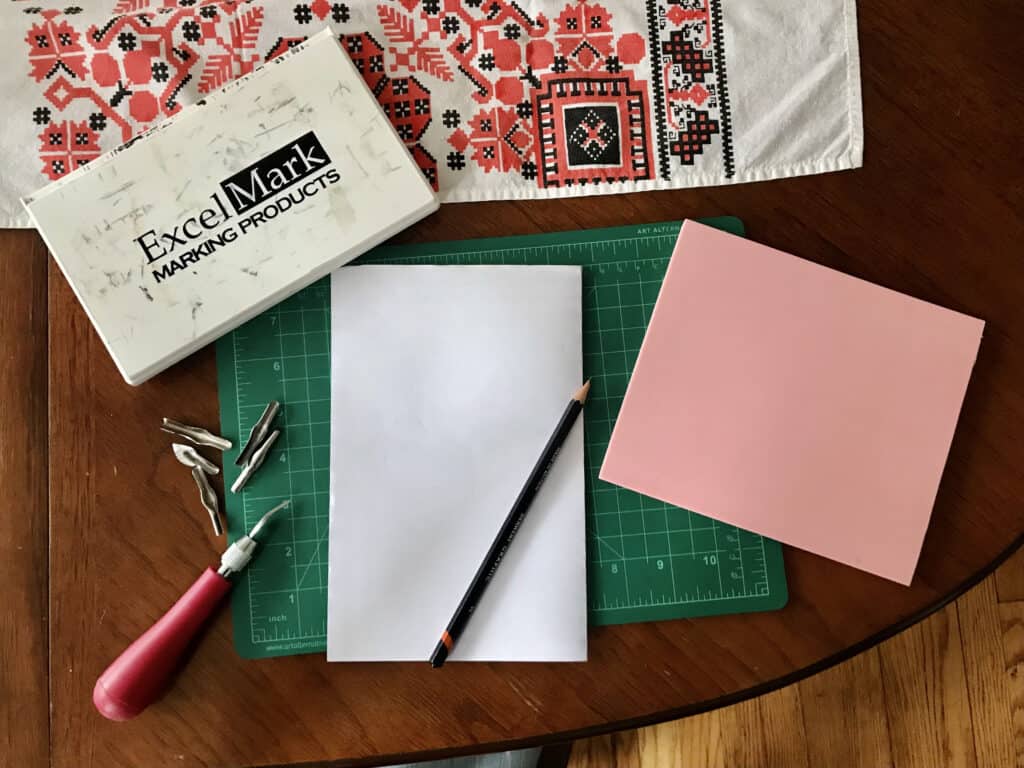
What You Need
• 1 speedy-carve rubber stamp block ($3-$25, depending on size; $3 for a 2”x3” stamp)
• 1 linoleum cutter tool with multiple cutters (around $13 for a good beginner’s option)
• 1 sheet of paper
• 1 pencil
• 1 ink pad in the color of your choosing ($6-$15, depending on size of pad)
Make Your Design
Draw or print out your stamp design the size you intend the stamp to be. If drawing your design, make sure you line the image well with your pencil. If it’s printed, you’ll need to fully trace over the printed outline with your pencil.

Transfer Your Design to the Stamp
Next, line your design up on the rubber stamp—face down. That’s right, your design should be face down on the stamp. Holding the paper with your design on it firmly in place on top of the rubber stamp block, take your pencil and color, with pressure, on the side of the paper facing you, making sure to color over the entirety of where the design is on the paper’s opposite side.
Remove your paper. Once you take the paper off the stamp, you should have a mirror image of your stamp design in graphite from your penciled outline on the surface of the rubber stamp! This is now your outline for carving.
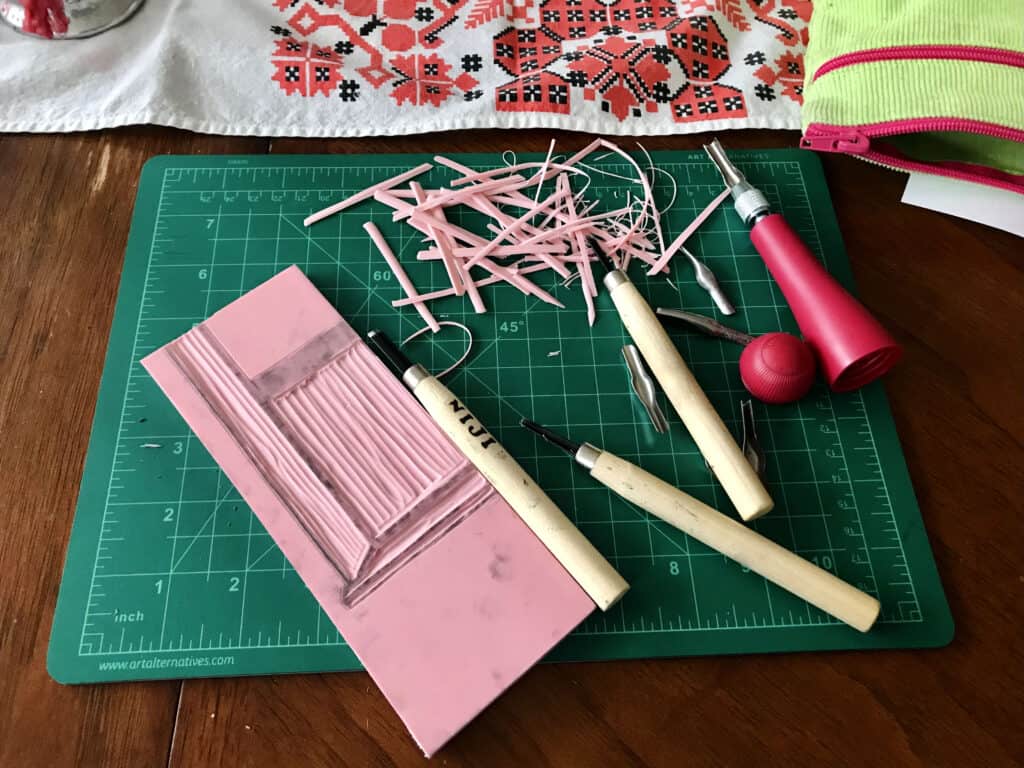
Carve Your Design
Now it’s time to take your cutter tool, with the cutter attachment of your choosing, and begin to carve your design into the stamp. Remember that what’s carved away will print as blank space; what you don’t carve away is what will take ink and print. You can always take a highlighter and color in the portions of the stamp to be carved out. Doing this is a helpful way to make clear from the start which portions of the rubber stamp are supposed to stay and which are not.
Most cutter tools come with a variety of cutters to use: look these over before choosing. They vary in width and shape and are each ideal for certain types of designs. For small, intricate designs, for example, you might want a really narrow cutter that has a sharp “v” shape. For larger spaces of the stamp to be carved away, on the other hand, one of the wide, “u” shaped cutters would work best.
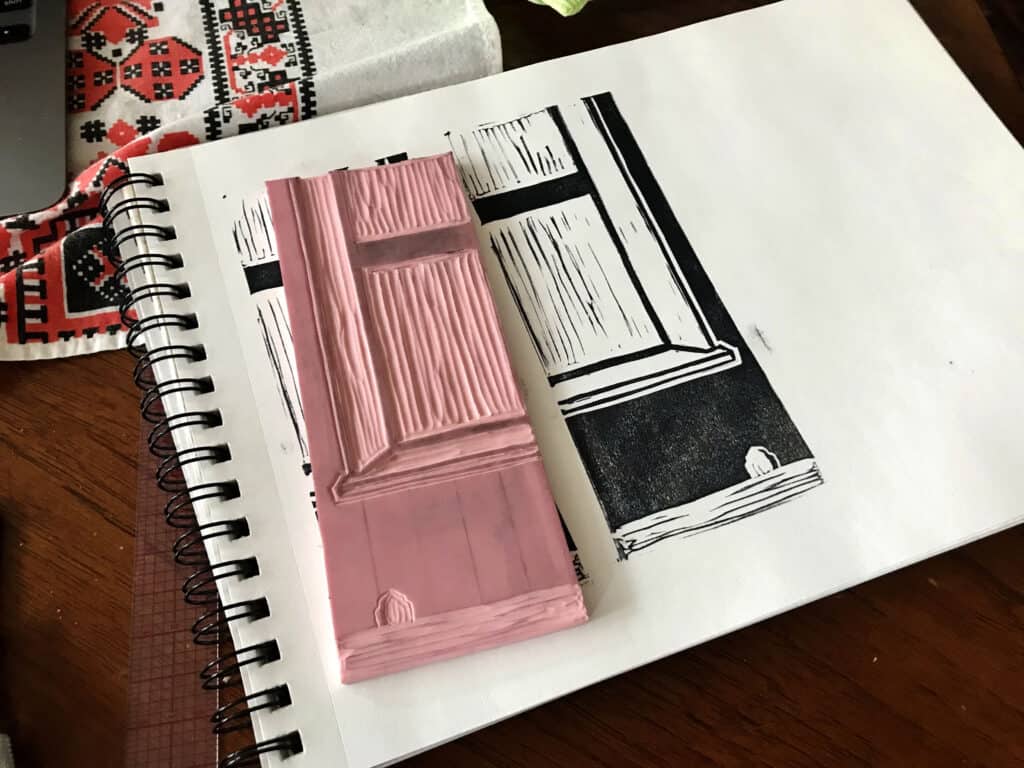
Stamp It!
Now take your carved stamp and press it firmly and evenly on your ink pad, then carefully place it on whatever you’re printing it on! Once placed, press firmly and evenly to distribute the ink onto your canvas. Remove the stamp and admire what you made!
At this first printing, I always find places in the stamp I want to change up—edges that need to be sharper, lines that need to be cleaner, a little detail to add in or take out. I then clean my stamp by running it under water and patting it dry, and go to work on those extra details. I’d recommend doing just a little at a time, stamping again, and seeing how you’re liking the results.
When finished, use your stamp to make greeting cards or bookmarks with cardstock paper, get fabric-friendly ink and print on tote bags, scarves, or tea towels, decorate snail mail to your friends, throw a house party and stamp everyone’s hands when they get there. There are innumerable possibilities for this budget-friendly hobby. Make a stamp! Put it everywhere!